
Installing customer gauges using an Android device
Updated for Alice Model 3
IMPORTANT: You will need your customer’s home WiFi network name and password to install and set up their gauge. Make sure to have that handy before starting this process.
If your company does NOT already have an Alice app account created:
Search the app store for “Alice gauge” and download the app
Enter name, email address, and create a password
Enter the last 6 digits of the gauge ID of the gauge you’re about to install (found inside the bottom of the gauge)
Give this gauge a name - we suggest the customer’s last name for ease of monitoring
Enter the address at which you’re installing this gauge
Select the tank type on which this gauge will be installed and whether it is an indoor or outdoor tank
Proceed to Step 2 to connect to WiFi
If your company DOES have an Alice app account:
Log in to the app with your company credentials
Click on the 3-bar menu icon in the upper left corner, and select “Add a New Gauge”
Enter the last 6 digits of the gauge ID of the gauge you’re about to install (found inside the bottom of the gauge)
Give this gauge a name - we suggest the customer’s last name for ease of monitoring
Enter the address at which you’re installing this gauge
Select the tank type on which this gauge will be installed and whether it is an indoor or outdoor tank
Proceed to Step 2 to connect to WiFi
Step 1
Step 2
If you are installing an outdoor gauge, remove the silicon cap and replace after you have connected your gauge to your WiFi (the cap distorts the colors of the light).
Press and hold down the button on top of your Alice gauge. After about 6 seconds the light will turn yellow. Keep holding. After 12-16 seconds the light will turn bright green. (Not everyone can see the change in color so release after 15 seconds even if you do not see a change in the color).
Release the button. Watch to see the light flash red and then blink blue, which means your gauge is now in setup mode.
If you did NOT see a quick red flash, it means the gauge is not in setup mode and you should start this step again.
Note: If you run out of time during this process, the light will stop blinking and Alice will go to sleep. Simply hold the button down again until the light turns bright green, then watch for the red flash and blue blinks.
Step 3

On your mobile device, go to the WiFi section within your settings to see a list of all available WiFi networks. Select the network named "Alice__".
Note: you may get a message that says “Internet may not be available.” Choose to keep the WiFi connection and continue on.

Step 4
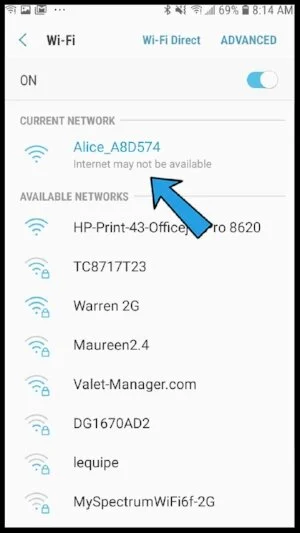
Alice will now be shown as the current network. Click on the settings symbol to the right of the network name, or click on the network name directly if there is no settings gear.
When the advanced options screen pops up, click “Manage Router,” or the link just below it.
Note: sometimes that link is tricky to click! Just keep trying if it doesn’t immediately work.

Step 5
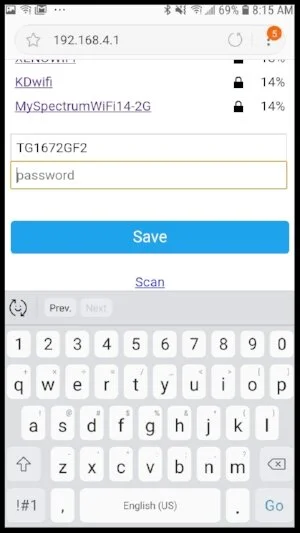
A new screen will pop up with a “Configure WiFi” blue button; click that button.

A list of nearby WiFi networks will appear. Select your customer’s home WiFi network and enter their WiFi password, then save.
Now turn your attention to the gauge lights for Step 7.
Step 6
Step 7
The blue blinking light on your Alice gauge will change patterns, then stop blinking altogether. You can close the WiFi connection screen on your phone.
Note: if the light continues to blink blue or you see a quick red flash, then your WiFi did not connect. Reopen settings on your mobile device and repeat steps 2-6.
Step 8
To make sure your gauge connected properly, take a manual reading. The gauge will continue to take readings every 6 hours automatically from here on out.
Hold down the button on the top of the gauge for about 5 seconds until you see the light come on, then release. The light will blink blue a number of times while your gauge takes a manual reading. If you see a quick red flash before the blue blinks, you have accidentally gone into setup mode. Reconnect to WiFi from Step 2.
When the reading has been taken, the light will go dark. If you see a quick red flash before the lights turn off, the reading was unsuccessful. Reconnect your gauge to your WiFi network and then try taking a manual reading again. If that still does not work, please contact us at support@myalice.com.
In your Alice app, click on the refresh button in the top right corner. You should now see the most recent tank level reading on the dashboard.
